7 Underwater Photography Tips for Instantly Improving Your Images
Do you enjoy underwater photography but feel that the quality of your images is not where you would like it to be? Are you just getting started and want your learning curve to be as steep as possible? To help you to improve your images and get the best results from your gear, here are 7 underwater photography tips, for achieving instantly improved images.
1: Get Close and Then Get Even Closer!

Getting close to your subject is essential when shooting macro and super macro underwater
One of the most common underwater photography tips that we all hear is get closer, get closer, get even closer! No matter how close you are to your subject, you are rarely as close as you think. Underwater, the more distance (water) you have between your camera lens and the subject, the more backscatter you are likely to experience (particle in the water), the softer the focus and the more blued-out your image will be as your lights struggle to illuminate objects further away.
If you think about these issues, it becomes obvious that zooming is not the solution, it won’t reduce the amount of water or backscatter, it won’t sharpen your focus and it won’t make your strobes more powerful – the only solution is to get physically closer. With some fish and more skittish critters, getting close can be tricky but not impossible (see tip 3 below).
2: Shoot Up
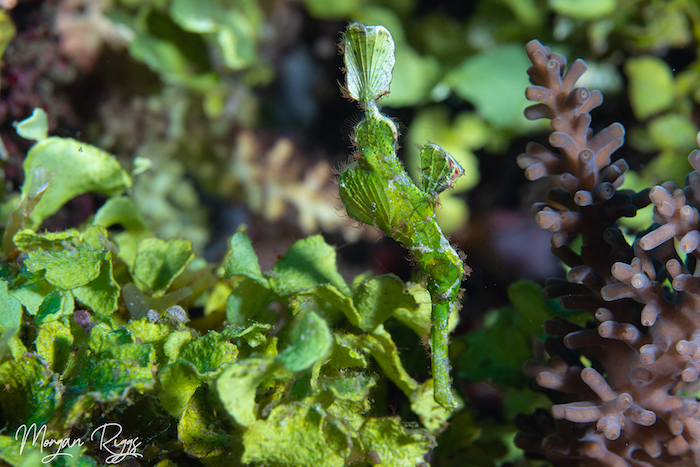
Get down to eye-level with your critter and shoot across or up
A strong underwater image is more like a work of art than a marine life image you might find in a fish ID book – which are often quite “flat” and taken from above. Think about getting down to eye level (or below) your subject and shooting up or across. Shooting up means that you’ll let more light into your camera which will help with focus and colors and it also means that you can capture blue backgrounds which will help your subject to “pop” rather than it blending into the background.
A clear blue background also makes the image appear “cleaner” and the subject sharper, as well as providing nice negative space (see composition in tip #5 below). When taking images in shallow water, try shooting up to include the sun in one side of your image to capture a sunburst effect.
In the image above, the photographer (Morgan Riggs) has positioned his camera at eye level with the Halimeda ghost pipefish and shoot across to give definition to the subject. If this image had been shot from above, the critter would have become “lost” among the Halimeda algae.
3: Educate Yourself About Your Subjects
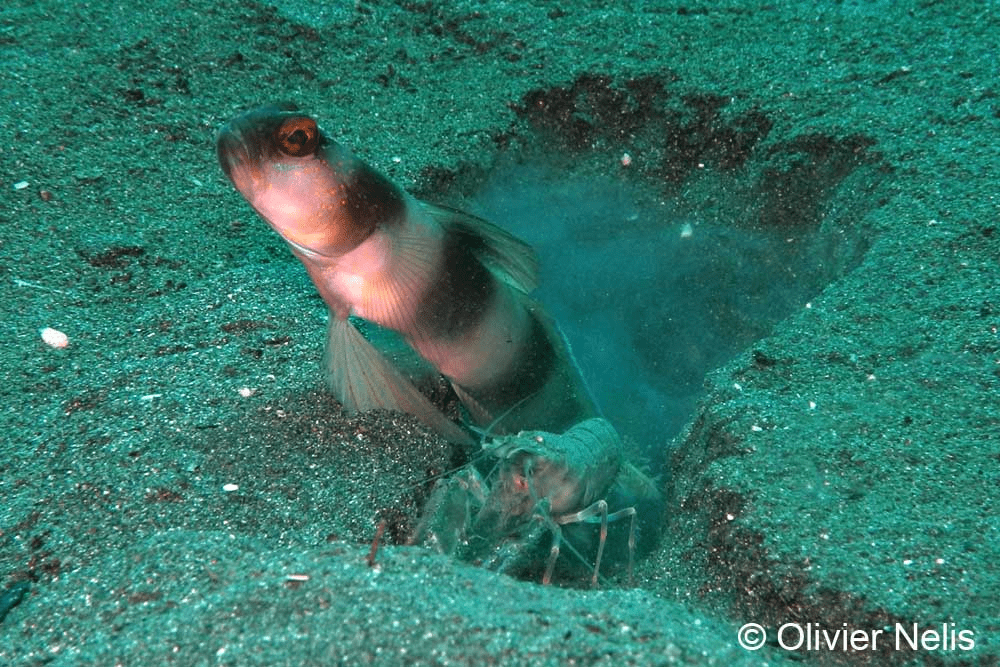
A Goby fish and blind shrimp cleaning its hole in Manado Bay
Probably one of the best underwater photography tips – yet one of the least talked about is understanding your subject. Knowledge and information about your chosen subject will help you to capture it better. Knowing how close you can get to a subject will help you to optimize your distance to it. With all marine life subjects, you’ll be able to get closer if you move in more slowly and give the fish or critter time to get used to you being in its space – this will reduce the risk of it being startled and swimming away.
Taking your time and waiting will allow the critter to start carrying on its behavior too, for example, a blind shrimp will hide in its hole when startled but once it, and its goby partner, become used to you being there, it will often carry on shoveling sand from its burrow. You’ll be able to capture a shot of the pair together which nicely tells the story of their symbiotic partnership.
Of course, lucky shots do happen but if you have a specific critter or fish which you would like to shoot, read up on its behavior and you’ll discover which habitats you are most likely to find it in and how best to capture it on camera. All Murex Dive Guides are trained in underwater biology for this very reason – it makes them much better spotters!
4: Adding Light and Effects
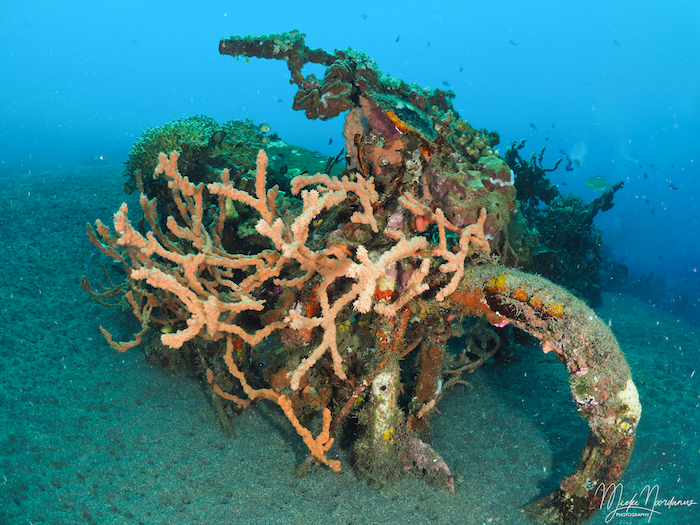
The motorbike is illuminated from the front almost entirely to the back. Lighting this distance is only possible with the use of external light sources – strobes or video lights.
For very close up shots of small, docile critters, for example, nudibranch, using the inbuilt flash on your camera may be enough but most likely you’ll want to add additional light to an image to capture better colors. Strobes and / or video lights can be used to create different effects, not just to bring out color.
Using two strobes means that you can fully eliminate shadows and minimize backscatter; using one light can also be used to create more shadows for artistic results, especially if you are attempting a profile shot. Detachable lights, which can be placed independently from your camera, allow for backlighting – the trick is to play around with different positionings until you create the effect you are looking for.
5: Composition, the rule of thirds and negative space
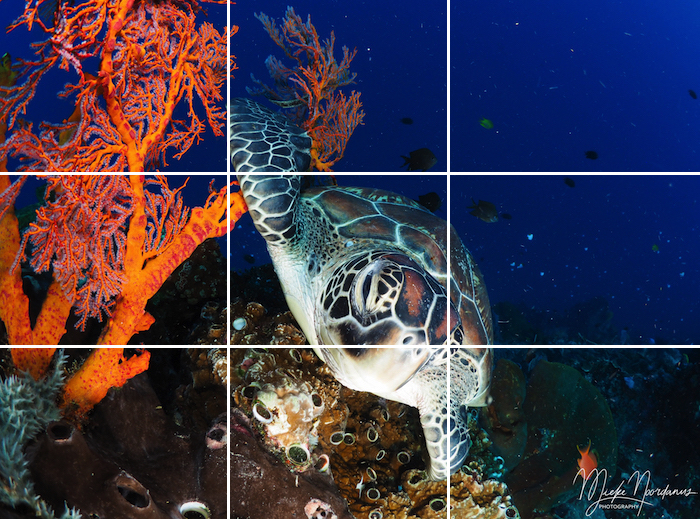
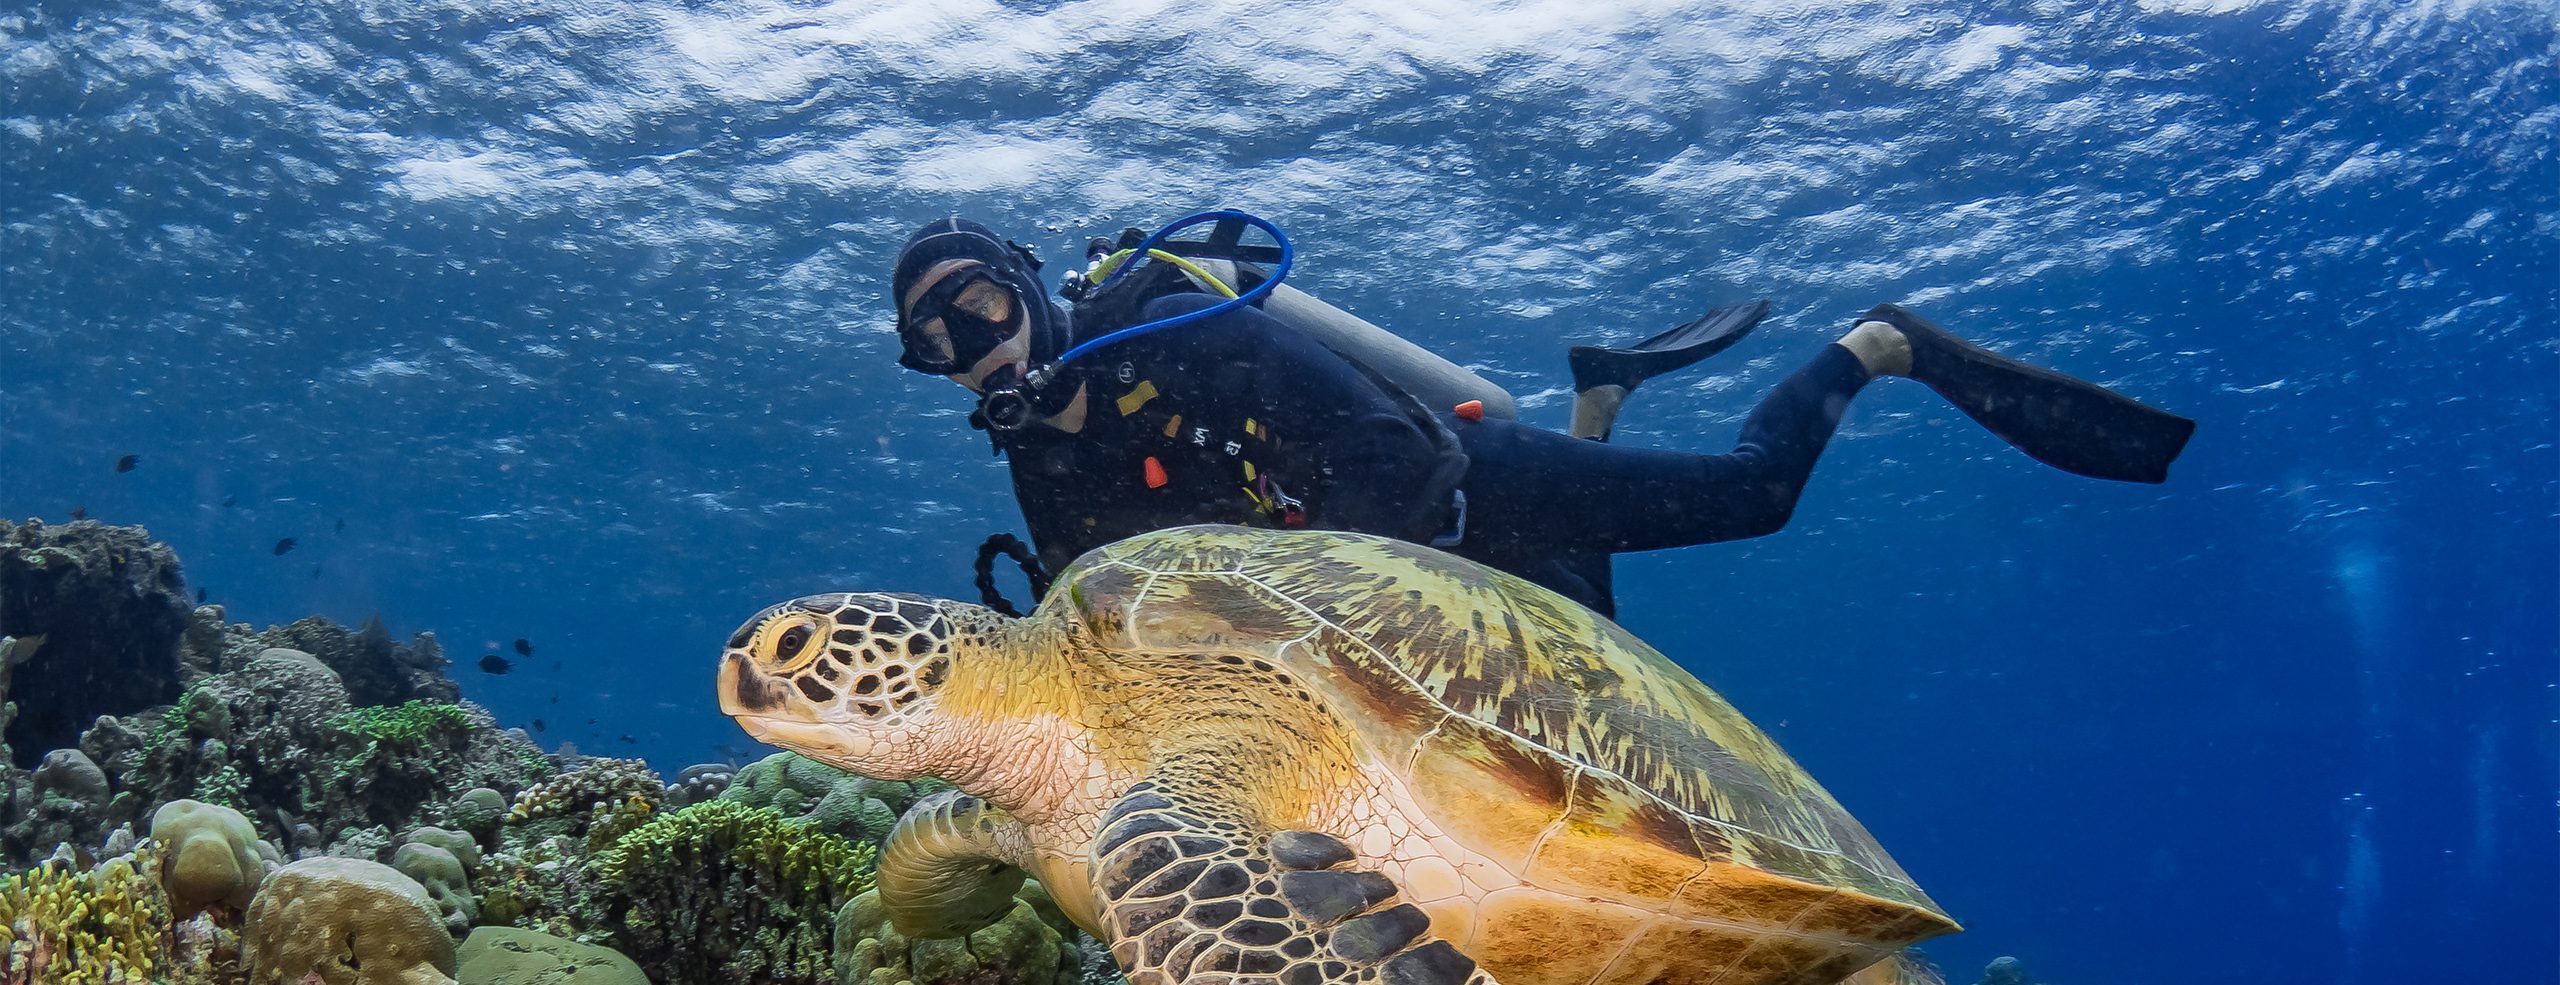
The rule of thirds applied vertically – One third coral, one third subject (turtle) and one third blue water (negative space)
When it comes to underwater photography tips, this one requires a bit of thought, and sometimes a bit of planning but it really does make a difference. The rule of thirds recommends dividing (either mentally or by using the grid lines on some camera models) your image into thirds horizontally or vertically. Fill each third with different content – the easiest way to imagine this from a horizontal perspective is to think of a fish resting on coral.
The lower third could be taken up by the coral (foreground), one third the fish (subject matter) and one third blue water (background). The blue water is “negative space”, negative space can also be a blurry coral, sand or other dead space. Negative space plays an important part in balancing the composition of your images by preventing them from looking too busy and by drawing the viewers eys to the subject rather than being distracted by the background.
In the shot above, the photographer (Mieke Noordanus) has applied the rule of thirds vertically. Note how the turtle’s eye – the main focal point, is located inside the central square.
6: Accessories
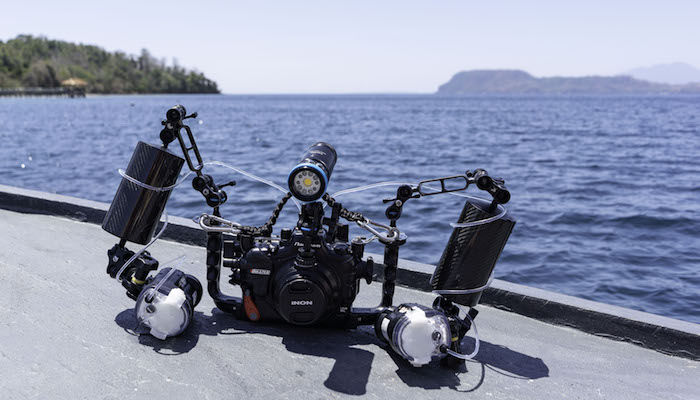
Build your rig according to your budget and needs. A tray, flex arms and external lights are recommended
Buying a camera and underwater housing is a significant investment which you will want to get the most of. As your budget allows, add accessories which will improve your images. External lights, such as a video light or strobes are essential for taking strong images. You’ll need a tray and arms to mount your lights on.

A diopter or macro lens will help you to capture the smallest of macro critters in focus
If you plan to start with one light, invest in a tray which allows for one on either side so you can build on your rig later. Other items which are worth considering if you are shooting with a compact camera include wet lenses; a good macro lens and a wide-angle or fisheye are ideal starting points.
7: Practice!
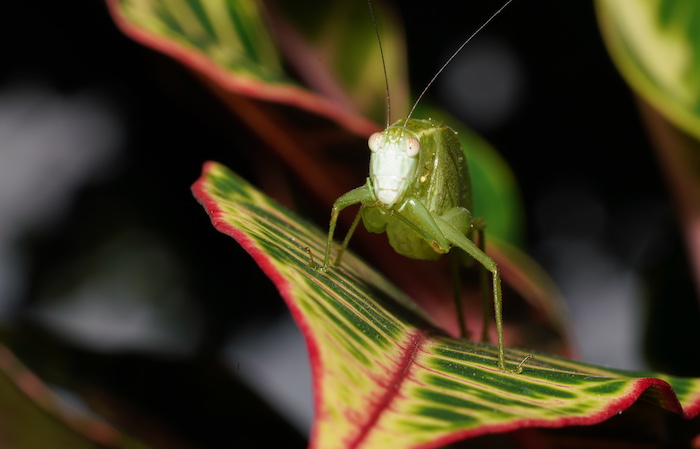
Practice your photography on land to get a better understanding of your camera’s settings and capabilities
The more you shoot and the more familiar you become with your underwater photography equipment, the better your images will become. Take your camera on every dive and don’t get stuck in a rut. Keep trying out different shooting techniques and keep pushing yourself to try new approaches.
When you’re not diving, motivate yourself to take your camera with you on land excursions rather than relying on your camera phone. Capturing family portraits, days out and landscapes are all ways to build your confidence in your ability to adjust your camera settings and it will pay off underwater!
Are you planning your next dive trip?
In North Sulawesi, the underwater photography opportunities are limitless, from shooting wide-angle shots of Bunaken’s walls, Bangka’s vibrant soft coral reefs and larger marine species including turtles, stingrays and schooling fish, through to the macro critters we find at all of our dive sites, there is always something to capture on camera. Follow these underwater photography tips and you’ll be returning home with images you can be proud of.
When you are not underwater, North Sulawesi’s topside scenery and exotic flora and endemic fauna lend themselves beautifully to landscape photography, nature and wildlife shots and of course portraits of the friendly locals. Why not explore more of North Sulawesi while you are here and join us on a Passport to Paradise? Dive Bunaken Marine Park, Bangka Island and the Lembeh Strait in one incredible trip. Boat diving transfers from resort to resort mean no wasted transfer days, no drying and packing gear – just dive your way from one location to the next and experience some of Indonesia’s most iconic dive sites along the way.
For more information or to make a reservation for Murex Manado, Murex Bangka or a Passport to Paradise, contact us on reservations@murexresorts.com. We look forward to exploring North Sulawesi with you soon.